Stairs 101 For Wood Floor Professionals
Doing staircases always intrigued me, probably because there’s just a different level of skill in the carpentry behind them. There is so much involved in doing a staircase, particularly knowing the codes, that some wood floor pros avoid stair jobs entirely. But when I began learning to tackle stairs, the more I did them, the more I felt a sense of accomplishment. When a homeowner is asking you, the wood floor pro, to do their stairs, oftentimes their staircases are squeaky and in pretty bad shape. When you’re done, the homeowners have something solid and beautiful, and that transformation attracts me to the work. I do stairs as part of my wood flooring jobs on a regular basis now. Here are some things wood floor pros interested in stair work should know.
Stair Part Basics
A great online resource is the website mycarpentry.com. If you go to their stair calculator, you can input the values for the height of the staircase and the amount of treads, for example, and it will tell you what height and depth they should be at. Depending on your situation, you may adjust the numbers to fit, but it’s a great tool to have.
Important Notes About Glue
On one of my first staircases, I didn’t glue the back of the tread where it meets the riser. There was a carpenter on the job site who noticed and showed me why it’s so important to glue anywhere there is wood-to-wood contact. If you don’t do that, the steps will eventually squeak, no matter how sturdy you build it, because there’s a lot of force on those treads when people are stepping on them.
For glue, I like any firm flexible flooring adhesive. I don’t use construction adhesive or carpenters glue, because those get brittle and will eventually break. It’s important to take advantage of changes in adhesive technology and use what will last the longest. In this situation, the glue isn’t there to lock it in place but to act as a cushion and support the tread while allowing it to move.
How I Handle Pricing
Typically when I do a staircase, I can estimate what I’m going to charge by the labor per step, so if there are 13 steps and I think my labor is $200 per step, the total for labor is $2,600. For the staircase on pages 35–37, I priced for each step but also had to estimate how long it would take for each skirt board on each side. That entire project, including the flooring, took three to four weeks, with my guys doing the flooring while I basically worked on the staircase by myself. My charge for the labor on that one was about $20,000.
Codes and Permits
The most important stair basics are that they shouldn’t trip someone and they shouldn’t squeak. Not tripping is the reason there are strict codes—if all the steps are one height and the top step is a different height, that’s a safety hazard. When you’re doing remodeling involving stairs, you can easily get into trouble. If you just add new treads on top of an existing staircase, you can end up short on one step, for example. In most cases, if you are installing new flooring on both the first and second floors, you can just add over the existing stairs, but if not, you’ll need to remove existing treads to make the heights work correctly.
Codes are updated all the time. Many older staircases no longer fit the codes for handrail height and tread depth—check current codes. It’s possible that if you rebuild it to the same size, it might be grandfathered in, but check to make sure.
Stairs can be a gray area when it comes to permits. Most wood floor pros are not licensed to do structural work. Particularly in bigger cities, you could get into trouble taking on the wrong staircase or altering the footprint, so know what’s required in your area. In most cases, if you are retrofitting a staircase and not changing the footprint or altering the depth of the step, you shouldn’t need a permit. If you plan to completely remove an old staircase, you should definitely check if a permit is required.
Essential Tools
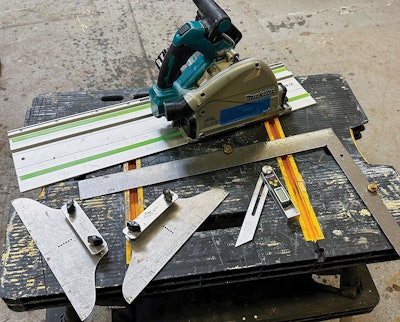
STAIR JIG: Having a good stair jig is important, because it allows you to measure the length and angles of the tread. There are multiple variations of stair jigs available—Woodwise makes one, and there are simpler versions available at box stores that are basically two straightedges that you clamp onto the ends of boards. Other versions have springs and pulleys; that’s all up to your personal preference (I’m a less-is-more kind of person). Whatever you use, you need to measure the exact shape of the tread, because walls are never perfectly parallel, so you can’t just measure the width of the tread and make straight cuts.
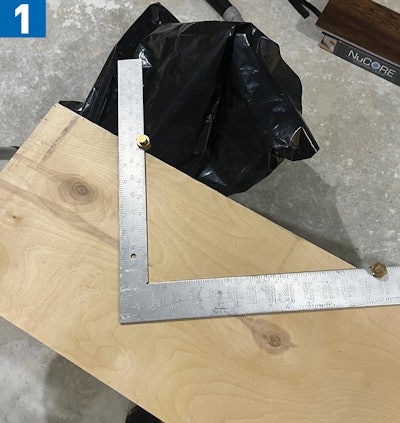
STAIR GAUGES: These are little brass knobs that attach to a framing square, and you use them to mark the rise and the run. You need them if you’re cutting new skirtboards or new stringers. They are about $3 at the box stores.
SAWS: Again, these are a matter of personal preference. I prefer using a track saw when cutting stair treads, because it makes life easier: You can easily make rip cuts and adjust your angles. But if you don’t have a track saw, using a sliding miter saw and a table saw is just as good.
IMPACT DRIVER: I don’t use nails on the construction part of a staircase. If the parameters are right, in certain cases I will use trim nails, but the majority of the time, all my construction is done with quality trim screws with a structural rating. If you buy cheap screws, they will snap or break under pressure.
ANGLE FINDER: It’s a pretty simple tool for finding handrail pitches, which are never going to be 45 degrees —probably more like 39 degrees. Once you’ve established that, you will use it throughout the whole stair build.
A Typical Overlay Job
My installation method varies depending on the existing construction. If the staircase is in good shape and the tread heights work out, then we’ll cap over the top of it, but I’m always going to reinforce the staircase before I build over it. How I do that is different depending on how the staircase was originally built and if it’s drywalled underneath (in which case, I don’t have access to it). In either case, I’ll use structural screws to reinforce the treads and risers.
When I’m capping an existing staircase, I’m always starting at the bottom with the riser and then the tread and go up the stairs like that. For this project, I’m adding curved skirt boards and overlaying treads and risers. In Photo (1) I’m marking out rise and run to notch the skirt boards over the treads.
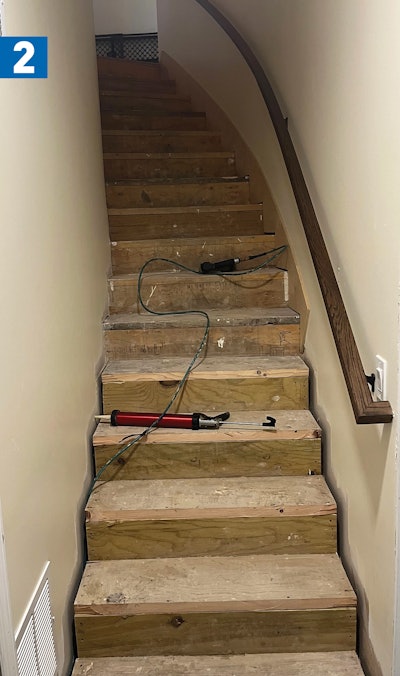
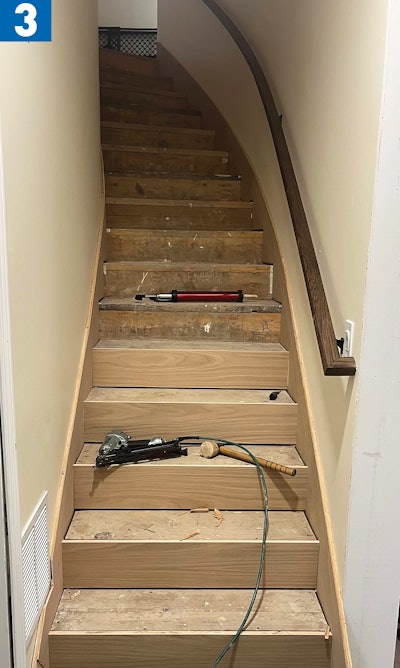
In Photos (2) and (3) I’m installing stringers first. By Photo (4) I’ve installed my risers, and then treads are always the last step. I’m using a stair jig and adhesive (remember, proper adhesive is important). You can see the final result in Photo (5).
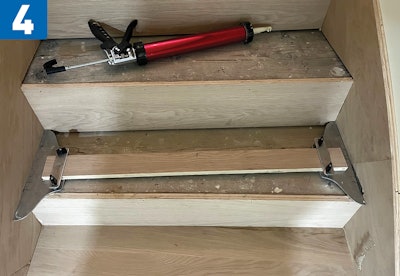
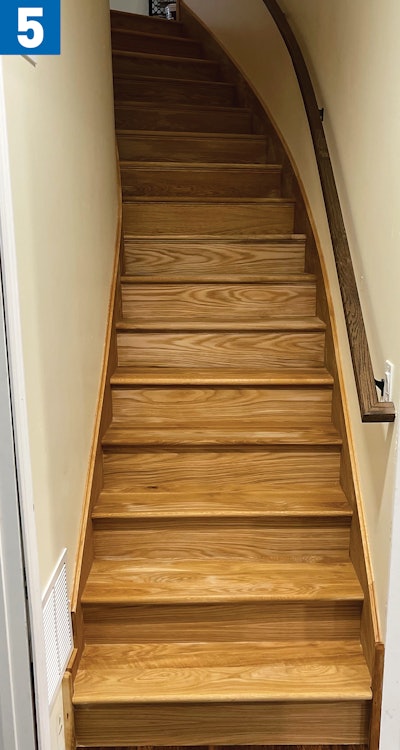
In Photos (2) and (3) I’m installing stringers first. By Photo (4) I’ve installed my risers, and then treads are always the last step. I’m using a stair jig and adhesive (remember, proper adhesive is important). You can see the final result in Photo (5).
Demo and Rebuild
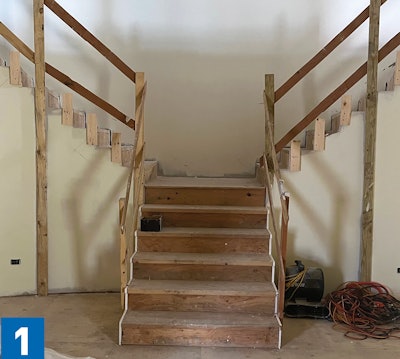
This job is essentially a complete rebuild. In Photo (1) we see a “before” photo (I have already taken out the handrails).
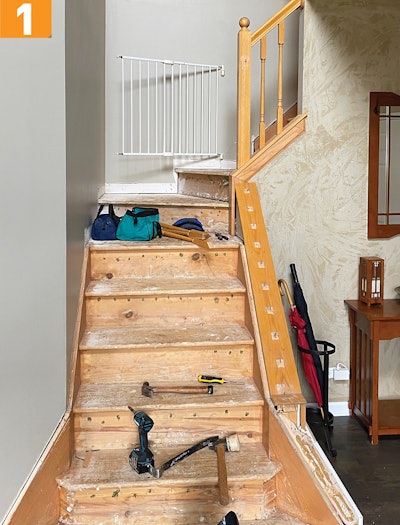
In Photo (2) I’ve demo’d that bottom set and I’m building it back to the same footprint—I’m not changing any dimensions, but just changing the materials used. This staircase was too squeaky, which means it was too loose. With the heights, I couldn’t install over the top—the bottom would have been too tall (it would have had something like 9-inch steps on the bottom, 7.5-inch steps in the middle and then a 6-inch step on the top). With most codes, you typically can’t have more than a 3/4-inch difference from bottom to top and can’t have more than a 1/4-inch difference between each step.
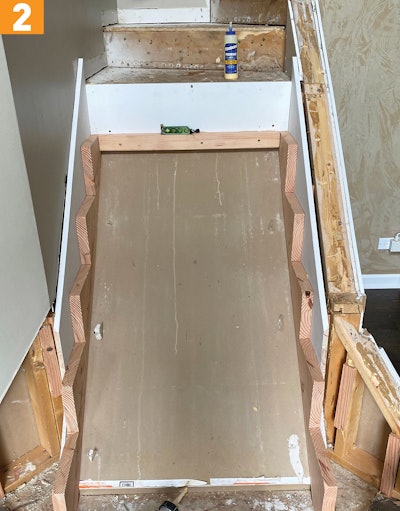
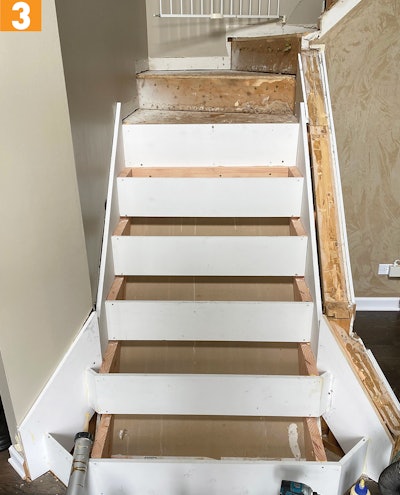
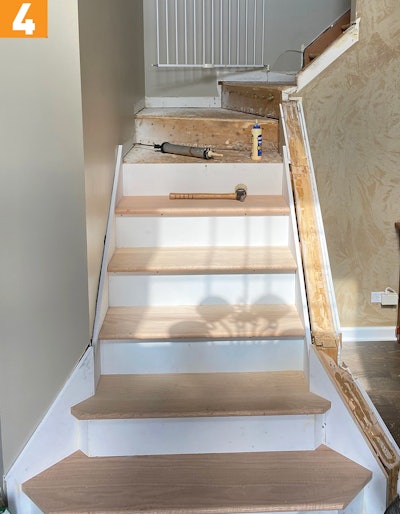
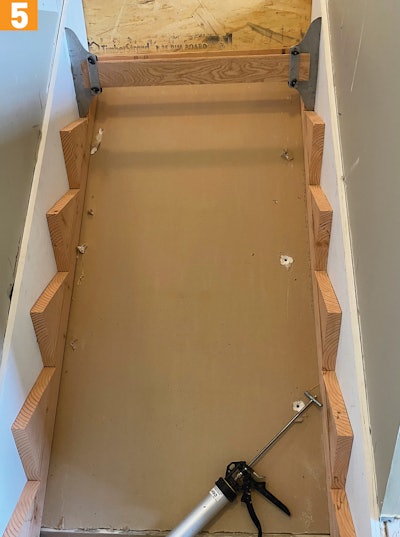
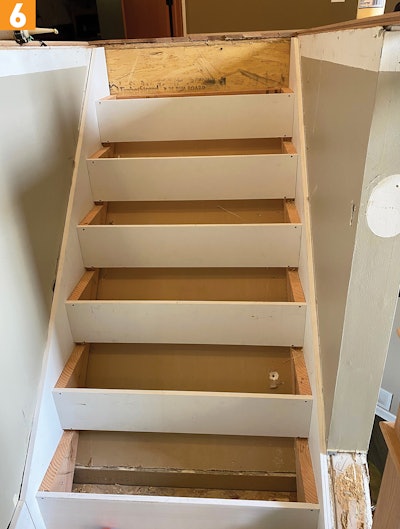
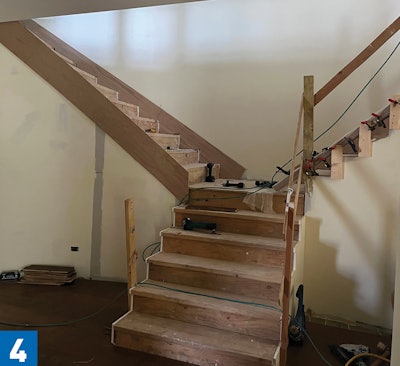
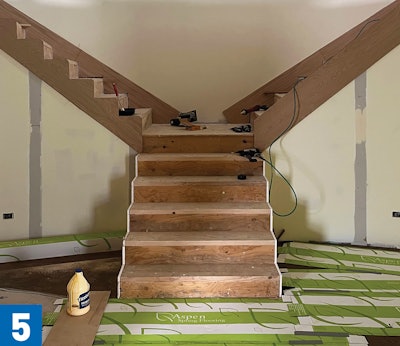
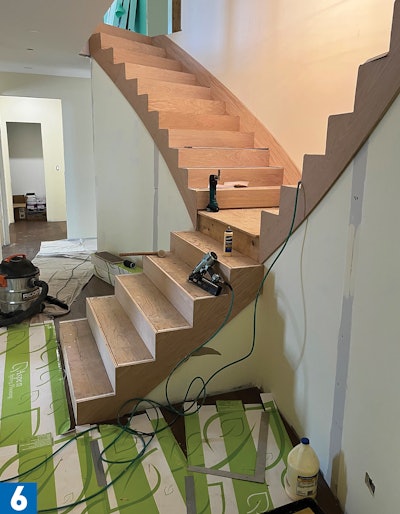
In Photo (3), I’m building risers, and in Photo (4) I’ve got treads in. Then the staircase makes a turn. In Photo (5) you can see I’ve got skirt boards and stringers built, and then in Photo (6) the risers.
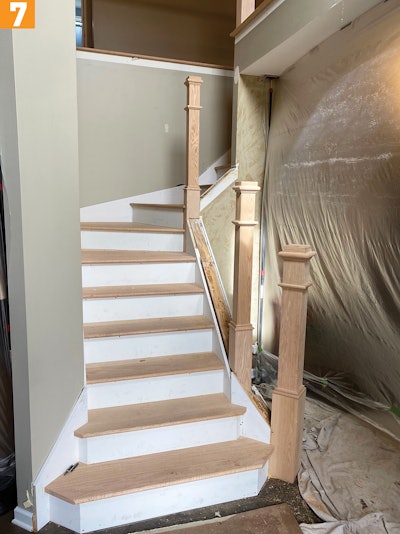
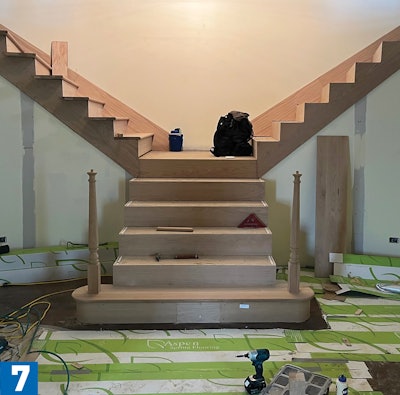
In Photo (7) you can see how I had to cut some pie-shaped treads for the space. In this photo I’m also anchoring the posts properly so they won’t move or wobble. I don’t like big fasteners being exposed, so you have to figure out how to bolt them to be aesthetically pleasing—you don’t want to see big brackets holding the post. These posts involved a lot of planning to ensure a proper layout and fastener schedule. We used structural lag screws and had to reinforce the framing in the wall to support the posts.
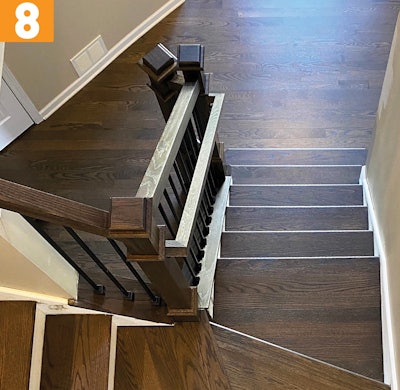
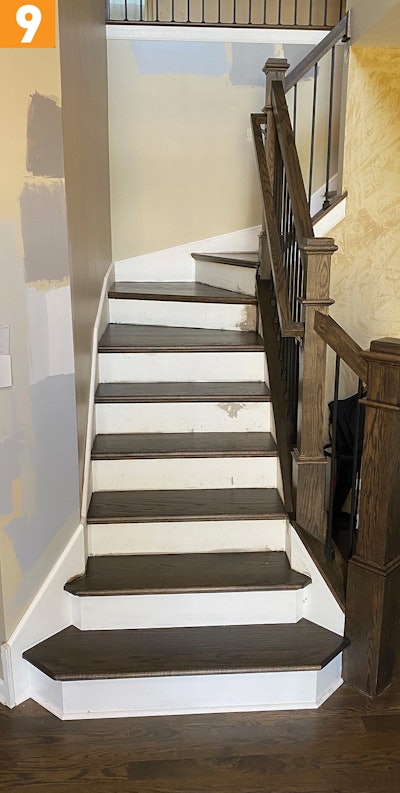
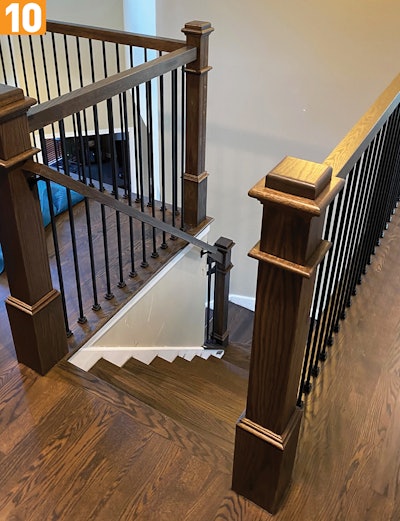
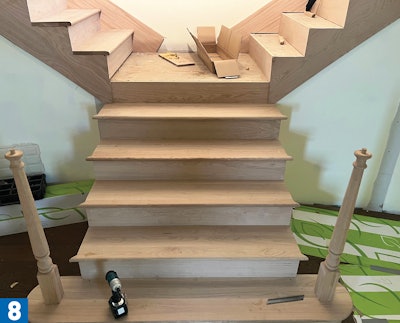
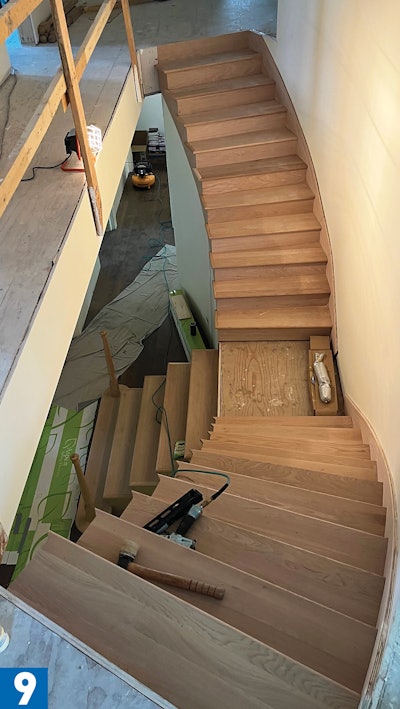
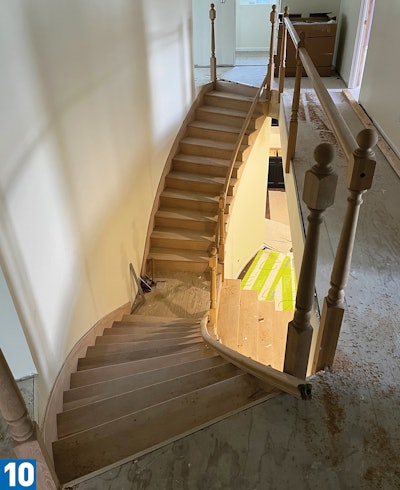
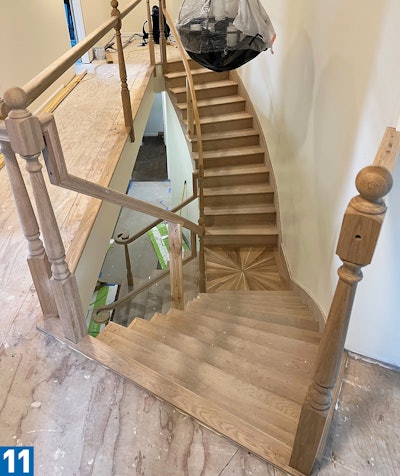
In Photos (8), (9) and (10) you can see the finished stairs. The client on this job was a carpenter, and I knew he was checking my work every day after I left the job. That added a little bit of stress, but I knew what I was doing was up to par, and I have gotten a lot of referrals off this job.
The staircase where I used all my skills
I definitely used all my skill sets on this staircase. We were contracted to do all the wood flooring, and the framers had built the structure of the staircase (Photo (1)). Another company came in to do the stairs and said they wanted to rip it all out. The homeowner didn’t want to do that, as he had already paid a lot of money to build it. But many stair companies like to build everything in their shop, so they wanted to start from scratch.
The homeowner was trying to figure out how to get his family moved in, and a couple other wood flooring contractors said they couldn’t do the project because of the curves. I had taken a stairs and jigs class and learned how to do curved stringers and bent handrails, so I was pretty confident I could get it done.
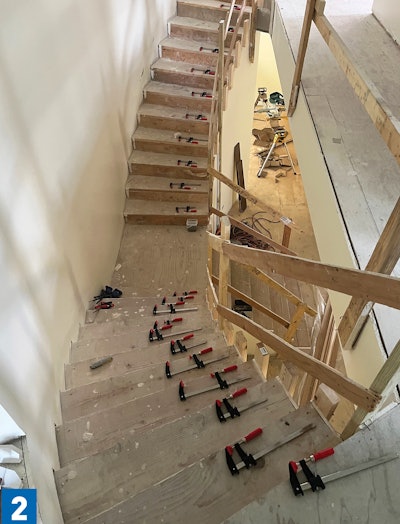
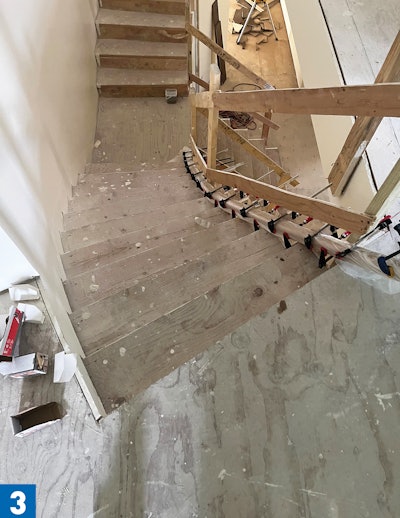
Bending handrails is a messy process, so I did that before anything else. He wanted a traditional handrail shape. It’s relatively simple, but without having taken in the class, I don’t know that I would have had the confidence to do it. In Photos (2) and (3), you can see I put blocks on each step; those served as mounting points for each rail to curve to. You can never have enough clamps! You need to have everything prepped and ready so that you lay out your plastic, glue up the slices, wrap the plastic around it, bring it to the staircase and clamp it all the way down. I had just one other guy on this, and trying to carry a 14-foot piece was challenging—more hands would have been helpful. It’s usually about 24 hours to let that set up (using the right glue—you don’t want that piece to flex). I used Titebond glue for this one, but another good option is two-component waterborne finish.
Once the handrails were bent, in Photos (4) and (5) you can see the step-by-step process of working on the curved skirt boards. They were essentially layered with 1/4-inch plywood or luan. I think here I had four layers, but it all depends on how thick you want it. The outside here is veneered white oak. You’re dealing with nominal sizing—typically 1/4-inch veneer is 3/16 inch, so you’ve got to kind of play with sizes to get the finished size you want. All of those were glued and stapled. The miters you see in Photo (5) aren’t cut until the skirt board is fastened to the wall—because the wall is curved, we had to get the right angle. Basically you take a piece of riser materials or 3/4-inch material and make a notch in it so it’s a horseshoe shape, and you can set that over your skirt board to get your mark.
In Photo (6), we mitered the risers into the skirt boards on the outside edge.
In Photo (7), the risers and skirt boards are done, and in Photo (8) I’m putting in treads. The bottom starter tread was fun because I ordered the the wrong size, so I had to modify it on site, but it worked well in the end. We mounted the posts into the starter tread and installed that as one piece. By doing it this way, I was able to hide the fasteners that reinforce the stability of the post—thinking out your process beforehand really helps makes a more stable and more attractive staircase.
By Photos (10) and (11), the treads, skirt boards and risers are all installed, and then I’m working on installing the posts. This staircase had 12 posts, which is quite a lot.
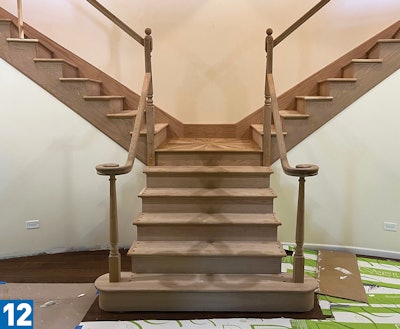
By Photo (12), the handrails have been installed, being extremely mindful of all the fastener placements. There are so many different options for mounting hardware—different brackets and mounting systems that hide fasteners; it pays to do your research. Once all handrails were in, we could start the staining and finishing process.
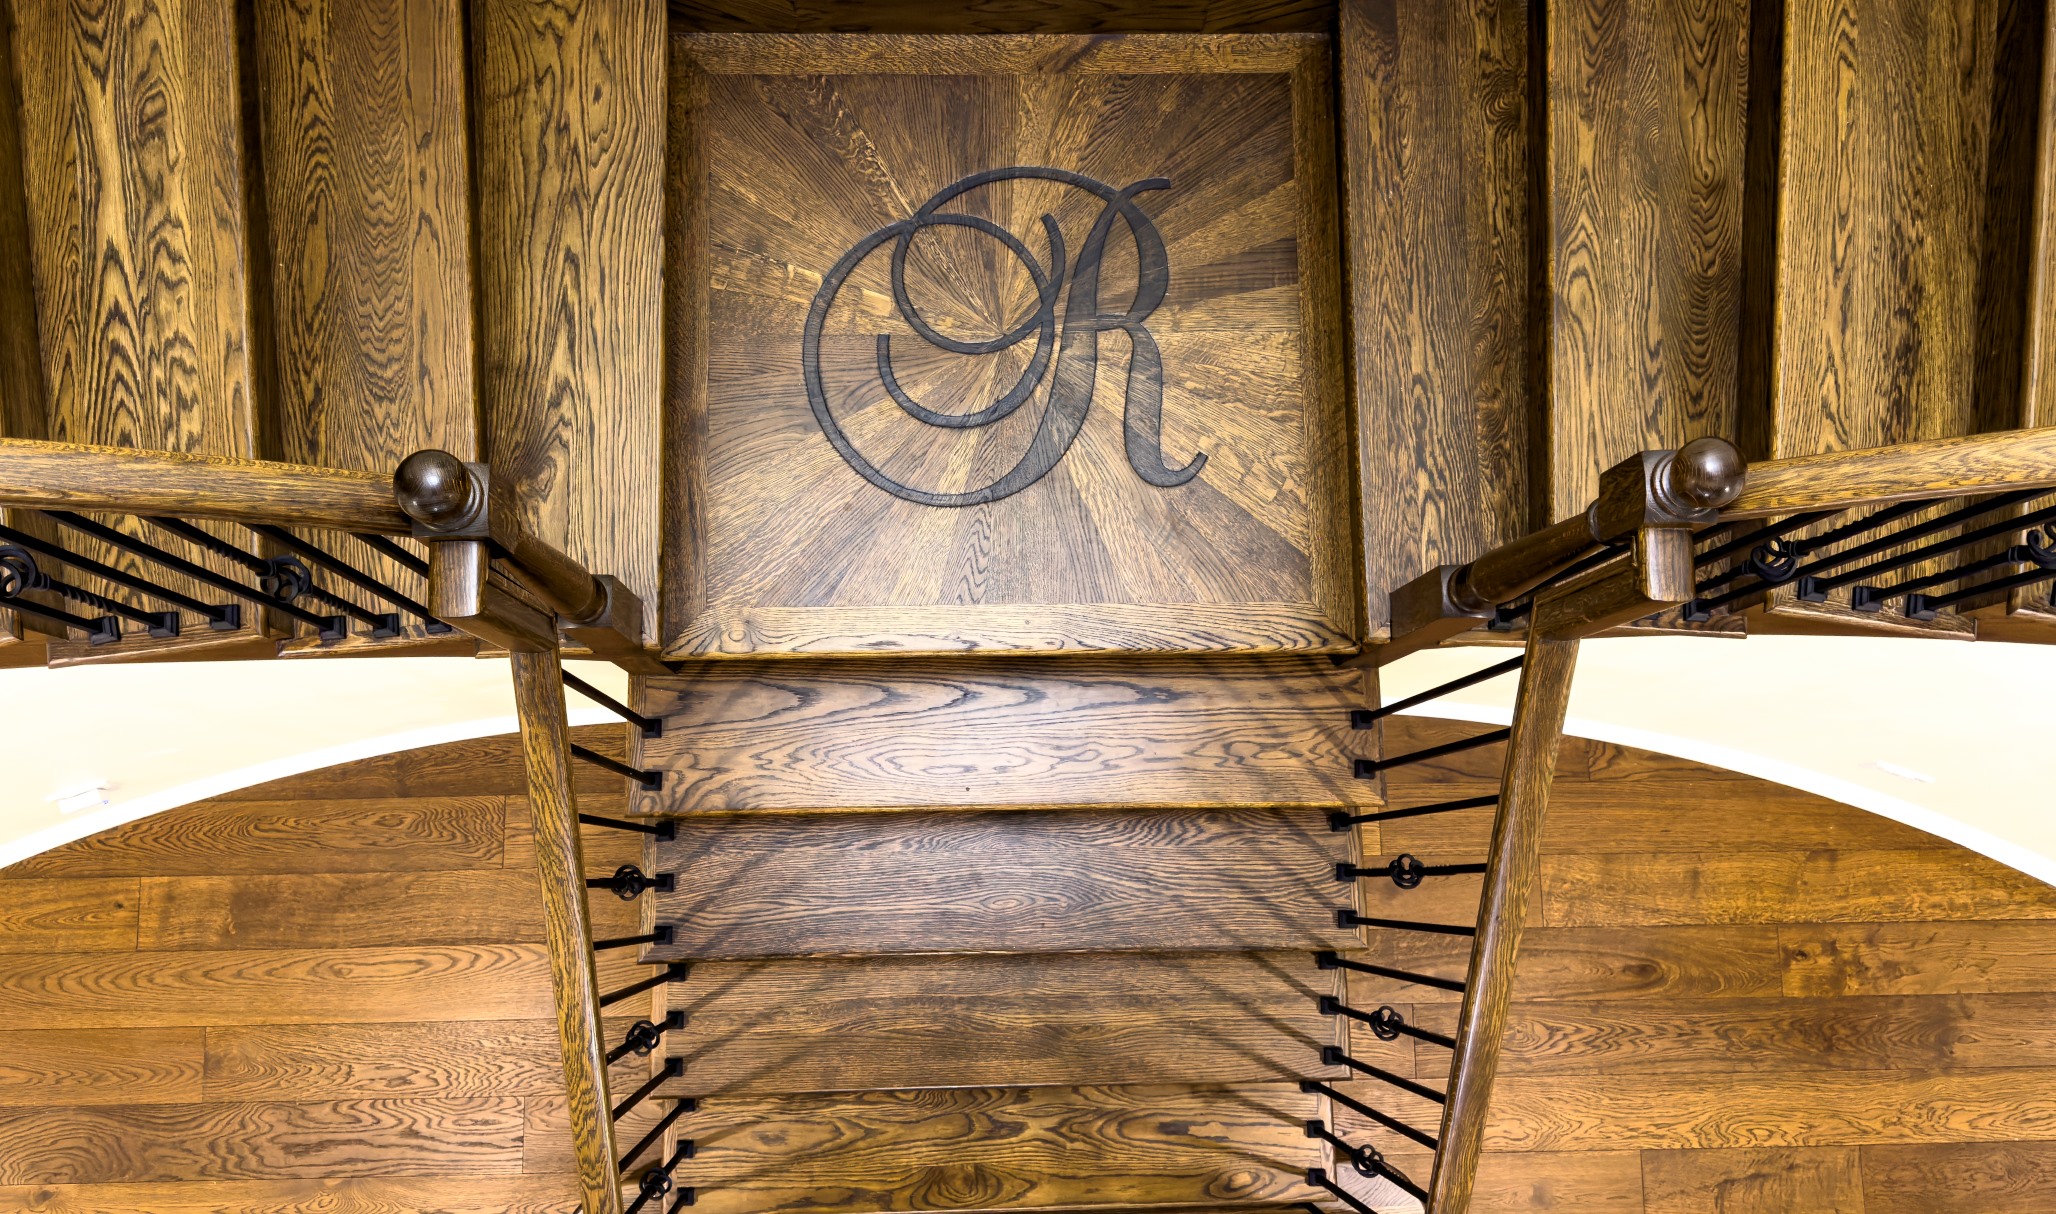
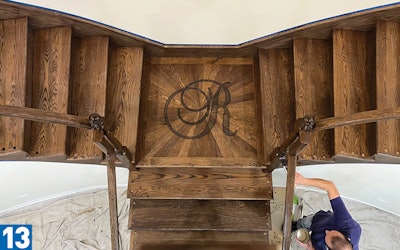
They had a nice chandelier above this landing, and I knew the homeowner wanted this to be something special. This is his forever home, so we settled on the idea of putting his initial “R” into the landing. Then I made a radius pattern and just traced the letter onto the landing to router it out freehand. It’s slightly recessed about 1/16 inch, but I beveled all the edges with a card scraper and used a chisel for the little curves and inside areas.
We stained the whole staircase first, and then the R didn’t pop the way I wanted it to. I showed him pictures of how it was looking, and he wanted it to stand out more, so we put a darker stain on just the R.
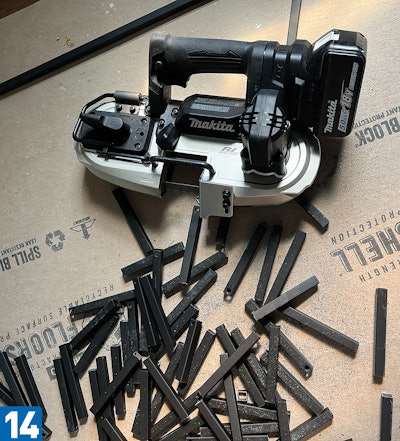
After the staining and finishing (photo (13)), we mounted the balusters/spindles. They are aluminum but have an iron look. We needed many sharp drill bits for getting nice clean holes in the treads. In the past I’ve used a metal blade on a miter saw to cut the spindles (I’m a floor guy, so I used what I had on hand), but that is less than ideal and can send metal shavings flying. I had seen people on YouTube using a band saw, so I purchased a handheld band saw for this project (photo (14)), and it was everything I hoped it would be.
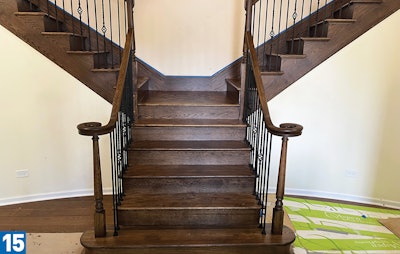
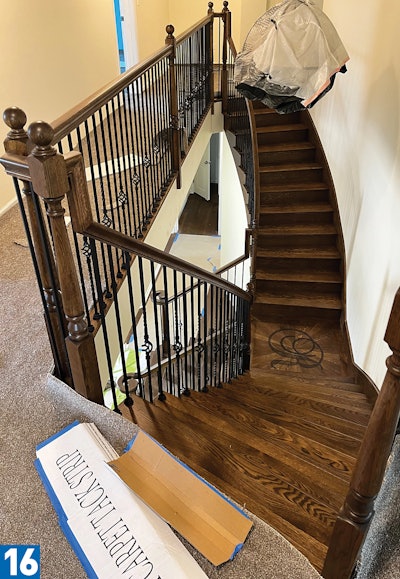
I was very happy with the end result (photos (15) and (16)), and so was the homeowner. I enjoyed putting my skills to the test and knowing that the homeowners will enjoy these stairs for many years to come.
In Photo (9) I’m marking out the curved treads. We scribed our curve on the inside of the wall, then scribed the outside where the tread meets up to the skirtboard. For our mitered returns, I created a jig, because going through and cutting all of those by hand or on a miter saw would take forever.
Have Any Question?
We’re here to help! Whether you need more information about our hardwood flooring services, schedule a consultation or have questions about your project, don’t hesitate to reach out.
- (630) 935-8606
- sales@reddyshardwood.com
Why The Dustrek?
To get back to the dust containment issue, all the FG sanding machines and edgers can be connected to a dust extraction system. FG presents here a solution composed by an efficient and sturdy cyclonic pre-separator made of sheet steel, that eliminates 95% of the dust and a heavy duty vacuum cleaner class M with an impressive suction pressure of 410 mbar and a special pocket filter. This system is specially designed for use with machines that sand very fine wood. The current problem of constipated filters is avoided by using the new pocket filter with 26 pockets.

